 |
| Making Paper Boats |
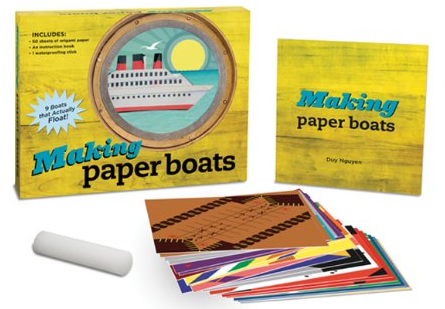
Origami, the art of paper folding, is a fun way for kids to work on visual perceptual and fine motor skills. Did you ever make a cootie catcher when you were a kid? That was origami. I have seen origami objects from animals to flowers to airplanes, but never boats. Making Paper Boats even comes with a wax stick so that you can run it over your paper to make your boat waterproof so it will float (for a while).
Origami patterns come in many different forms and skill levels. From beginner pieces with just a few folds, to awesome 3D models that would be way beyond one of my therapy sessions (and skills!), you can make most anything out of paper. Robert Sabuda is well known for his elaborate and whimsical paper art and pop-up books.
Origami sets typically include colored paper and step-by-step patterns, and can be found in formats including boxes likes this one, calendars and books. You can also buy just the colored paper squares. I have also downloaded patterns and paper squares off the internet and watched tutorials on YouTube. With that being said, let's see what's in the box. There are patterns for nine different boats including canoe, ferry, submarine, catamaran, fishing boat, sailboat, battleship, cruise ship, and speedboat.
The book starts with instructions for several of the basic folds, including valley, pleat, sink and mountain folds, and definitions for the different symbols and lines used in the book. Now the fun begins with instructions for the nine different boat models. Models range from three to eight pages of instructions. The paper squares in this kit are 6" X 6" and include solid colors as well as paper patterned for specific boats. It is my practice, when working on origami projects, to sit side-by-side with the individual when modeling folds for him to copy. Sitting across from someone may cause confusion spatially as his right is now your left and vice versa.
Try this:
- Make sure folds are flat and crisp. Folds that are not will just make it harder to keep folding precisely as you go. I use a popsicle stick and run it across the fold to make it lie flat.
- Lay a thin ruler or other flat edge on the line if individuals have difficulty folding a straight line. Fold the paper over it and crease.
- Start with simple models, like a cootie catcher, and work your way up. Origami can be very frustrating if you start off too hard. I know. I have wadded up more than one project in my day.
- Give two directions at a time after the individual gets better. Can he remember them and the sequence?
- Interpret the directions yourself and then let the individual copy your modeling as you fold. There may be many printed lines on the paper, especially when you are just starting a project, that may be very confusing to look at and know what to do.
- Give verbal directions of what you are going to do, then do it as they look on. Then let them fold their own.
- Go float a boat!
- Work on manual dexterity, fine motor precision, finger isolation, tool use, coordinated use of both hands, motor planning, visual closure, eye-hand coordination, spatial relations, executive functioning skills, play and leisure exploration and participation
If you are interested in purchasing this item or just want more information, click on the image below.


No comments:
Post a Comment
Thank you for taking the time to comment.